
(PMP) Password Manager Pro WEB based, is a solution that helps IT professionals to manage identities in the organization of passwords, SSH keys and even SSL certificates.
This product allows us to control and monitor user access to systems with sensitive information.
The PMP also helping us to prove that the organization is complies with regulations such as PCI DSS, NERC CIP, SOX that require the organization to have qualified access control.
The PMP agent can be installed on Windows and Linux stations,
PMP Agent can be installed on both Windows and Linux operating systems.
Prerequisites:
Set up a new server with the System Requirements of ManageEngine website:
https://www.manageengine.com/products/passwordmanagerpro/system-requirements.html
Opening ports from all the servers/computers you want to manage to the PMP server according to the requirements of ManageEngine:
https://pitstop.manageengine.com/portal/en/kb/articles/list-of-ports-used-in-password-manager-pro
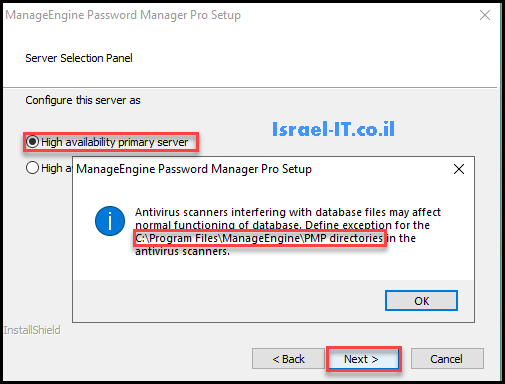
Download and install “Password Manger Pro” on your server:
https://www.manageengine.com/products/passwordmanagerpro/download.html


Connect to the admin panel using browser with one of the following URLs:
https://localhost:7272
https://127.0.0.1:7272
https://ip_address:7272
Username: admin
Password: admin
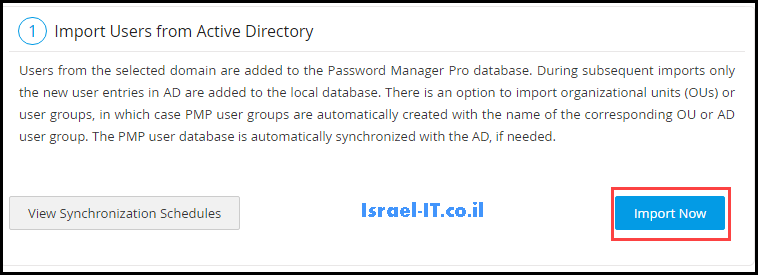
Now lets set up connection between Password Manager Pro to Active Directory and then we will learn how to grant permissions:
Go to –> Admin –> Authentication –> Active Directory
Under “Import Users from Active Directory” click on “Import Now” and fill in the required sections:
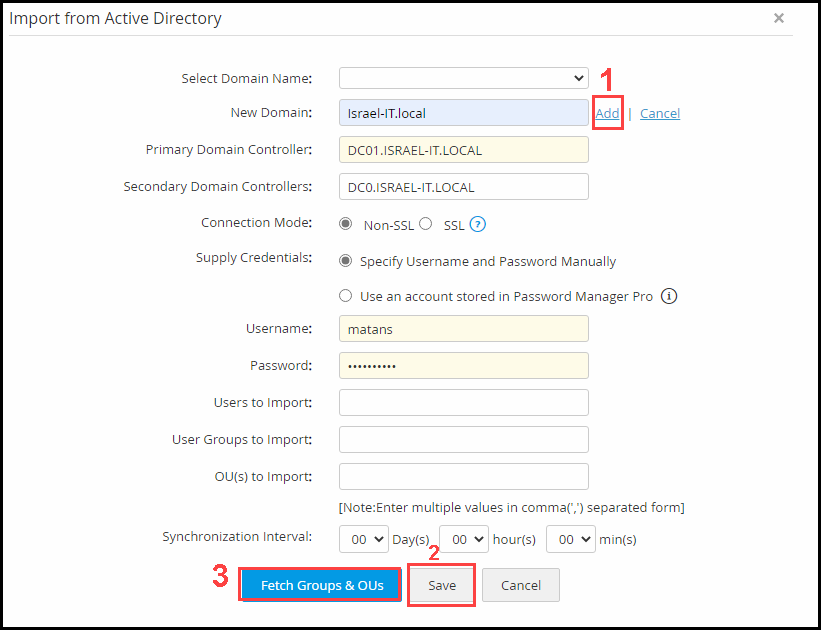
Select the group or OU that contains the users you want to import.
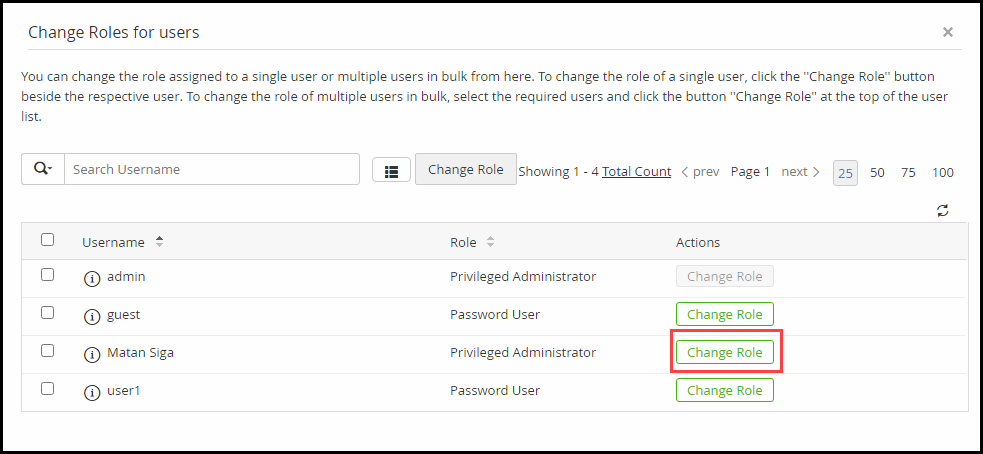
In the next window you can grant permissions to users or groups.
תחת “Enable Active Directory Authentication” לחצו על “Enable Now” בכדי שנוכל לבצע אימות מול הפאנל ניהול בתצורת LDAP.
לאחר מכן התנתקו מהמערכת והתחברו עם משתמש ה-AD שלכם.
Under “Enable Active Directory Authentication” click on “Enable Now” so that we can perform authentication against the management panel in the LDAP configuration.
Then log out of the system and log in with your AD user.


We have reached the last step in the article and that is to configure an SSL certificate on the Password Manager Pro server.
To issue and sign an SSL certificate for a web server, first we need to define a new template on your CA server according to the following article:
https://learn.microsoft.com/en-us/windows-server/networking/core-network-guide/cncg/server-certs/configure-the-server-certificate-template
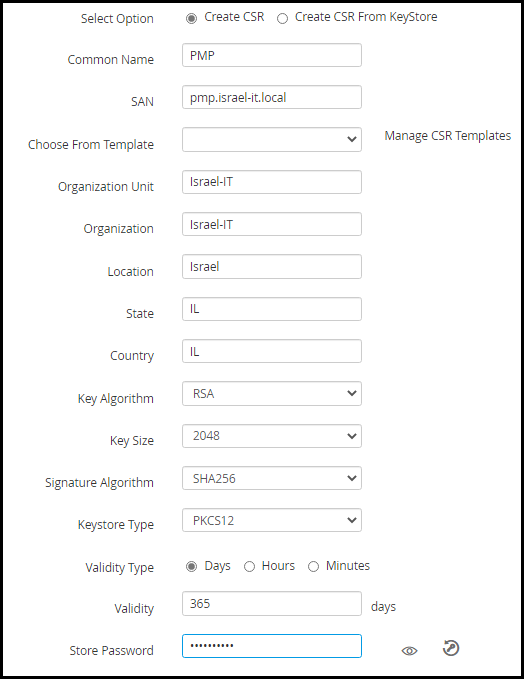
And now let’s issue the certificate:
Open the PMP admin panel and go to:
Certificates –> CSR
Click on “Create” and fill in the sections to request a certificate according to your organization.

After the CA server has signed the certificate, export it to PKCS12 /PFX.

At this stage we will define the SSL certificate in the management panel in the following way:
Go to –> Admin –> Configuration –> Password Manager Pro Server
Upload the SSL certificate that we exported earlier.
Keystore Type:PKCS12
Keystore Filename: "Your SSL Certificate"
Keystore Password: "Type The Password Of Your SSL Certificate"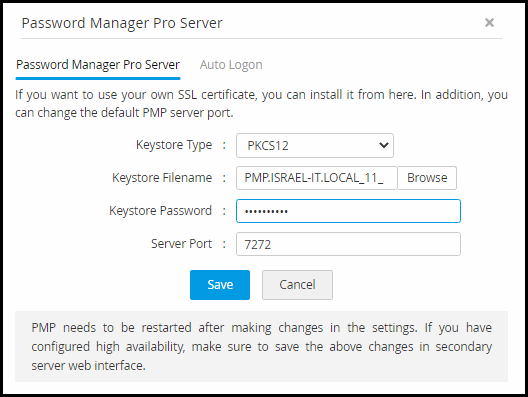
That’s all, click Save, restart the server.
Connect again to the management panel with the Common Name you defined in the SSL certificate.
For example:
HTTPS://PMP.israel-it.local:7272
This Article Was Written By Matan Sigavker
