Hi,
In this guide I will show you how to install an SSL certificate on the Endpoint Central \Desktop Central server.
We will create a CSR request using Endpoint Central script and will issue that certificate against CA server.
After that we will install the SSL certificate on the Endpoint Central server and connect to the management panel securely (HTTPS).
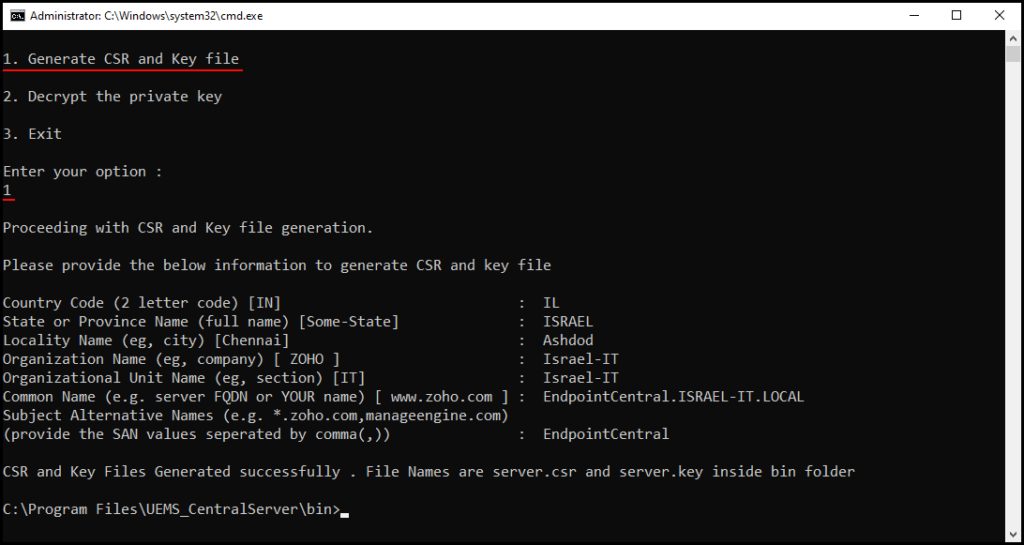
- Open CMD as Administrator and run the following commands:
1. cd “C:\Program Files\UEMS_CentralServer\bin”
2. generateCSR.bat\.
- You will see 2 options:
1. Generate CSR and Key file
2. Decrypt the private key
Choose “1” and press “Enter”.
- Type your “Country Code” according to the following list of countries and then press “Enter”
- https://www.digicert.com/kb/ssl-certificate-country-codes.htm
- Continue to fill in all the other sections according to your organization until you receive the following message: “CSR and Key Files Generated successfully . File Names are server.csr and server.key inside bin folder”
If you made a mistake in one of the sections, you will have to run the script again and fill in the sections again.
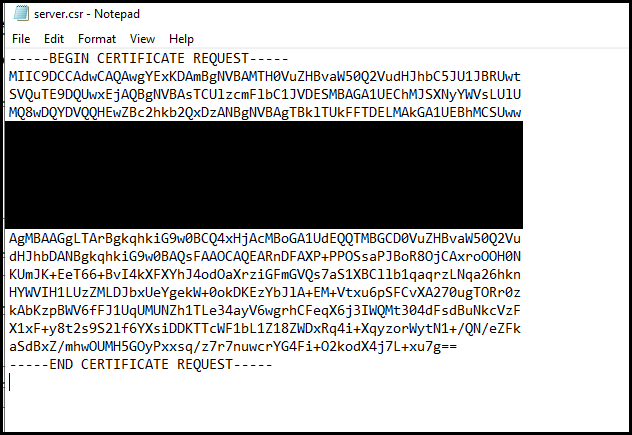
- Make sure you have created 2 new files under the path: “C:\Program Files\UEMS_CentralServer\bin”:
server.csr
server.key
- Copy that 2 files to a separate folder, connect to the corporate CA server via the WEB
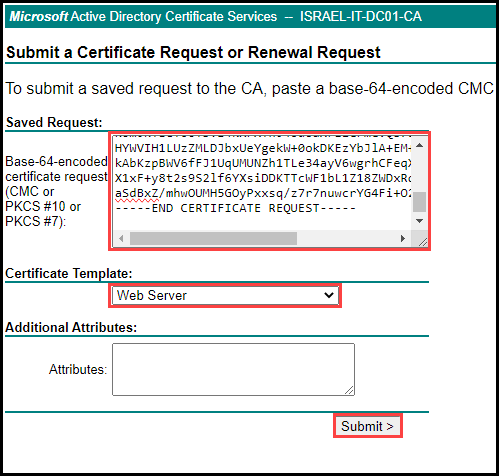
And now we will make a request to issue a certificate in front of the CA server.
For example:
http://CA-SRV/certsrv
- Click on “Request a certificate” and then “advanced certificate request“


- Open the CSR file you created earlier as a text file, I left the default file name (server.csr).
- Copy the entire content of the text file (which is the Certificate Request) using CTRL + A and CTRL + C.
- Return to the browser and paste the Certificate Request under a panel named “Saved Request“.
- In the “Certificate Template” tab, choose a template that is appropriate for WEB certificates (if you don’t have one then you will need to create a dedicated WEB template) and to finish click on “Submit“
- Download the signed certificate by clicking on “Download certificate” and move the certificate to the folder where the “server.key” file we created at the beginning is located.

- Open the new certificate you downloaded, by double clicking on the file.
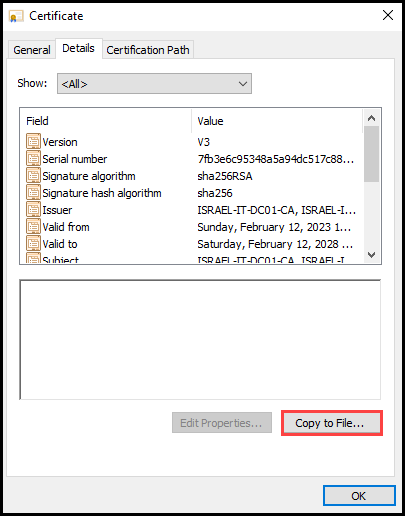
- Go to the tab named “Certification Path” mark your CA or SUB CA server that appears there and click on “View Certificate“

- Now go to the “Details” tab and click on “Copy To File” on the lower right.
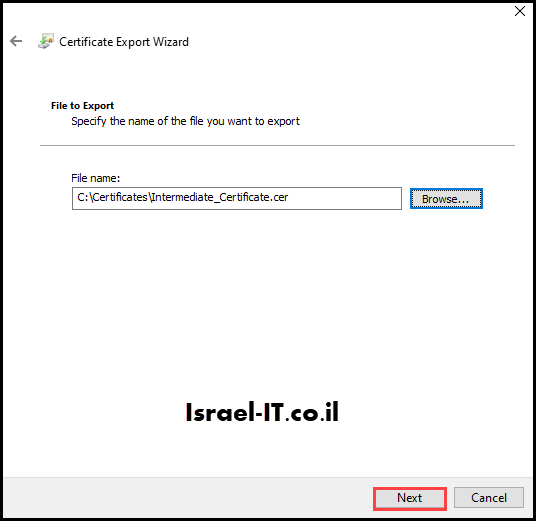
- Please export to a file as follows:
1. In the first window click “Next” and in the “Export File Format” panel select “Base-64 encoded X. 509 (.CER)” and click “NEXT“.

2. Save the certificate under the name “Intermediate_Certificate” click “NEXT” and then “Finish“
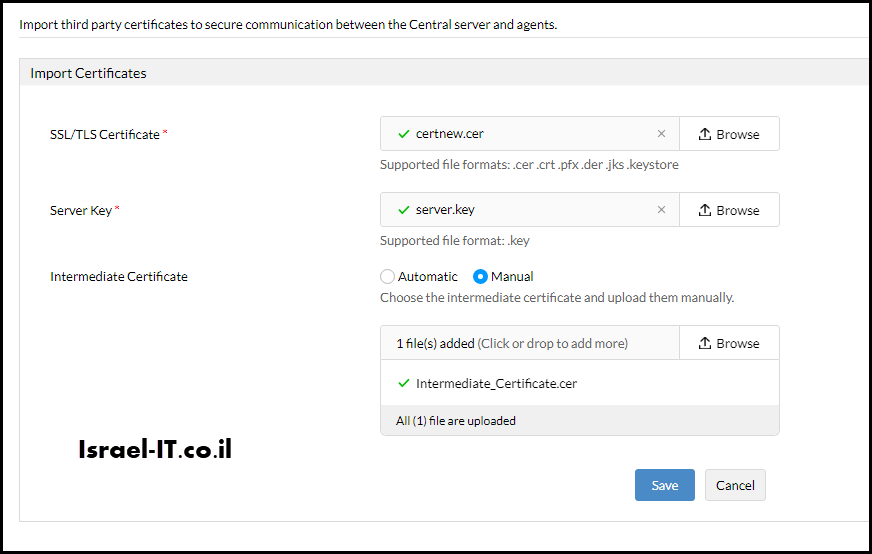
- Log in to the Endpoint Central admin panel and go to the following path:
Admin –> Security Settings –> Import SSL Certificates

- Let’s import the SSL certificate we created:
SSL/TLS Certificate – Choose the certificate we signed against your CA server.
Server Key – Select the “.KEY” file we created at the beginning with the CSR request file.
Intermediate Certificate – Set it to “Manual” and upload the certificate we saved earlier as “Intermediate_Certificate” and click “Save“.
At this point, a window may pop up with the following message:
“The certificate you are uploading has a subject name that does not match your current NAT settings. Do you really intend to import this certificate and change the NAT settings?”
Just click “YES“.
Go to:
Admin –> Server Settings –> Server Settings

- Mark the “Enable Secure Login (Https)” checkbox and click “Save Changes“.
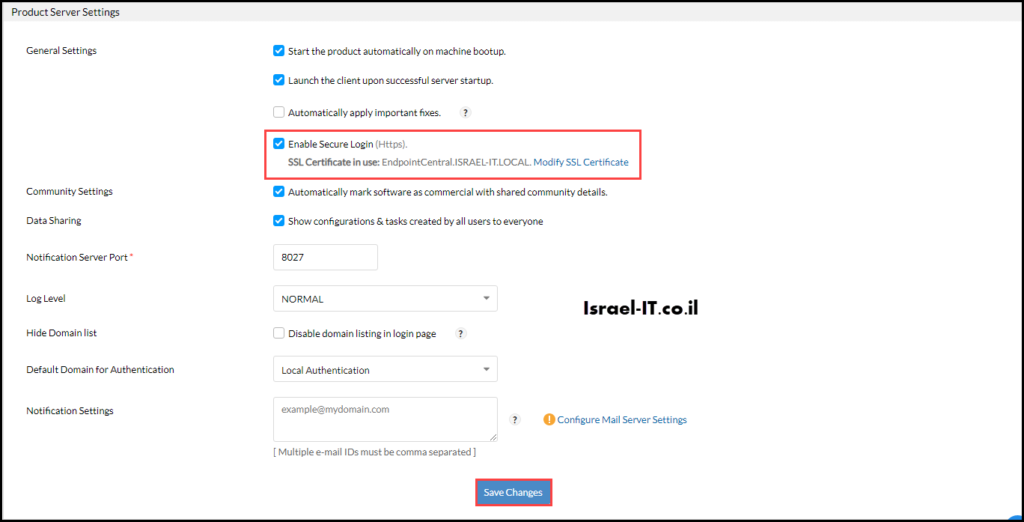
- If everything is correct, the following message will pop up: “Product Server Settings Saved Successfully“.
- What remains to be done is restarting the server for the setting to take effect and then you can connect to the Endpoint Central management panel securely (Https).


This Article Was Written By Matan Sigavker